
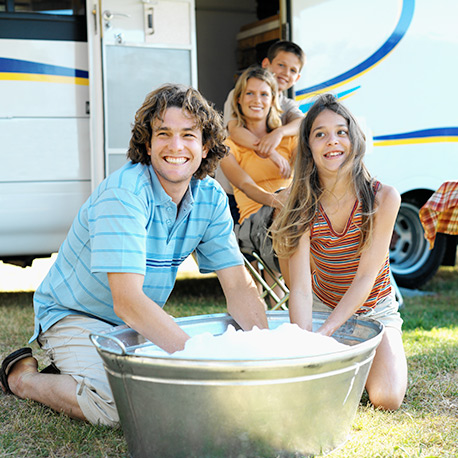
Spring cleaning can feel like a daunting task, especially when you have to factor in your traveling home (RV) and your permanent home. But the prep work now will be well worth it as you enjoy a clean and organized camping season. With the right tools and some handy tips, you can make cleaning an RV much easier than you think. Read on for our recommended action plan!
Exterior Steps
1. Cleaning the Exterior Surface.
The first step to tackle can be a big one – cleaning the exterior surface of your RV. Of course, the bigger your RV, the greater the challenge! Make sure to consider additional equipment to help get the job done, especially since you’ll be cleaning some hard to reach places.
Cleaning the roof and body of your RV can involve a variety of tools and cleaning solutions dependent on the material used in the design your RV. The safest method of cleaning for your exterior finish is to wash by hand, but you can use a pressure washer if you’re careful with it.
Start by cleaning your roof, so that you don’t end up cleaning the sides twice due to runoff. Most RVs today have rubber material for the roofing. Using cleaner designed for this rubber will prevent you from doing permanent damage to the roof. Avoid products that contain petroleum solvents or harsh abrasives.
Metal RVs can be cleaned with standard car wash chemicals, assuming they’re non-caustic. Be careful with pressure washers, high pressure can get water in-between metal layers and cause serious problems! If your model is an older, unpainted one, standard chemicals may cause damage. It’s always best to consult your manual or a dealer first!
Fiberglass models can be cleaned with a quality RV wash-and-wax product. It’s important to avoid decals if you’re using a pressure washer, as it can damage them or even force them off.
Note: Always test any heavy-duty cleaners in hard to notice spots to make sure it’s not causing more problems than it solves.
2. Don’t Forget the Wheels & Undercarriage!
After cleaning the top and body, it’s important not to forget the underside. In addition to being a likely spot for buildup, this is where a lot of the hardware (including your wheels!) is and it’s important to maintain them.
Cleaning underneath your RV can be done with a simple brush. You won’t need to be as careful with your tools down here, so consider using a stiffer brush to get the tough grime out. If you have a pressure washer, you can use it to blast off any hard-to-clean spots, but you’ll want to make sure it’s not set too high. After it dries you can consider using a dry lubricant to prevent more dirt buildup.
3. Waxing, Sealing & Prevention
It’s inevitable that your RV is going to meet with the elements. Between wind, debris, water and the sun, it’s a good idea to give your RV some extra protection to keep it looking good as new even years down the road. Properly waxing the exterior from top to bottom will help prevent fading and UV damage, especially if your unit has decals.
Due to the sealants that you should be using, grime tends to accumulate mostly in areas like the wall joints, doors, lights, and appliance outlets. When you’re giving these a bit of extra attention, make sure not to damage the seal!
Interior Steps
4. Prepping the Interior
Cleaning the inside of your RV is like cleaning your home. It’s much easier to clean if you get objects out of your way, so start by opening the windows and removing anything inside cabinets, plus any cushions or other parts that can be easily taken out to clean around or under.
5. Clean Top-to-Bottom
Once everything is out of the way, this is the hardest (but simplest) part: CLEAN! Make sure not to cut corners! You can use most common household cleaners, just make sure that they’re appropriate for the any of your cabinets, fabrics, and appliances. As far as extra tools go, try to keep it to the basics. You don’t need 3 different tools to clean up dirt, and a compact hand-vac can handle most RVs front-to-back.
One recommended method is to start “top-to-bottom.” This helps make sure dirt or dust that gets knocked loose during the process doesn’t require you to go back and redo your work.
We’ve included a checklist near the end of this post to help you not skip past any important parts.
6. Finish with the Floors
Now that everything else is spotless, you can work on cleaning the floors. It’s best to start with a broom to get the easy dust and dirt out. Once you have the easy stuff removed, you can start on the tough spots.
Pick out your cleaner of choice based on the floor type of your RV. For vinyl or ceramic tiles, you can use water mixed with ammonia to really get it clean. If you have laminate, you may be better off using a simple mixture of water and a touch of vinegar. Carpeted floors should of course be vacuumed, but also consider getting a steam clean from time to time. This will help keep them looking brand new.
Quick Tips for Keeping Your RV Clean All Season
- Use a door mat to keep dirt outside
- Sweep, dust and mop frequently
- Wipe up spills immediately
- Squeegee shower doors after every use
- Consider stain resistant treatments for upholstery and carpets
- Multi-purpose cleaner lets you handle any problem without needing 30 different bottles
- Microfiber cloths are a safe way to keep everything clean without worrying
- Prevention! It’s easier to prevent stains and keep dirt out than it is to remove them
Download the RV Spring Cleaning Checklist!
Contact RV Wholesale Superstore
If you’re looking for the perfect RV for your camping adventures, the professionals at RV Wholesale Superstore are ready to help. Visit us in-person at 5080 W. Alexis Road, in Sylvania, OH or call us at (844) 601-1171
Connect with us on Social Media!